What-If Tools
Here you can see an example of a What-If-Tool deployement.
Adding Plugin to Organization
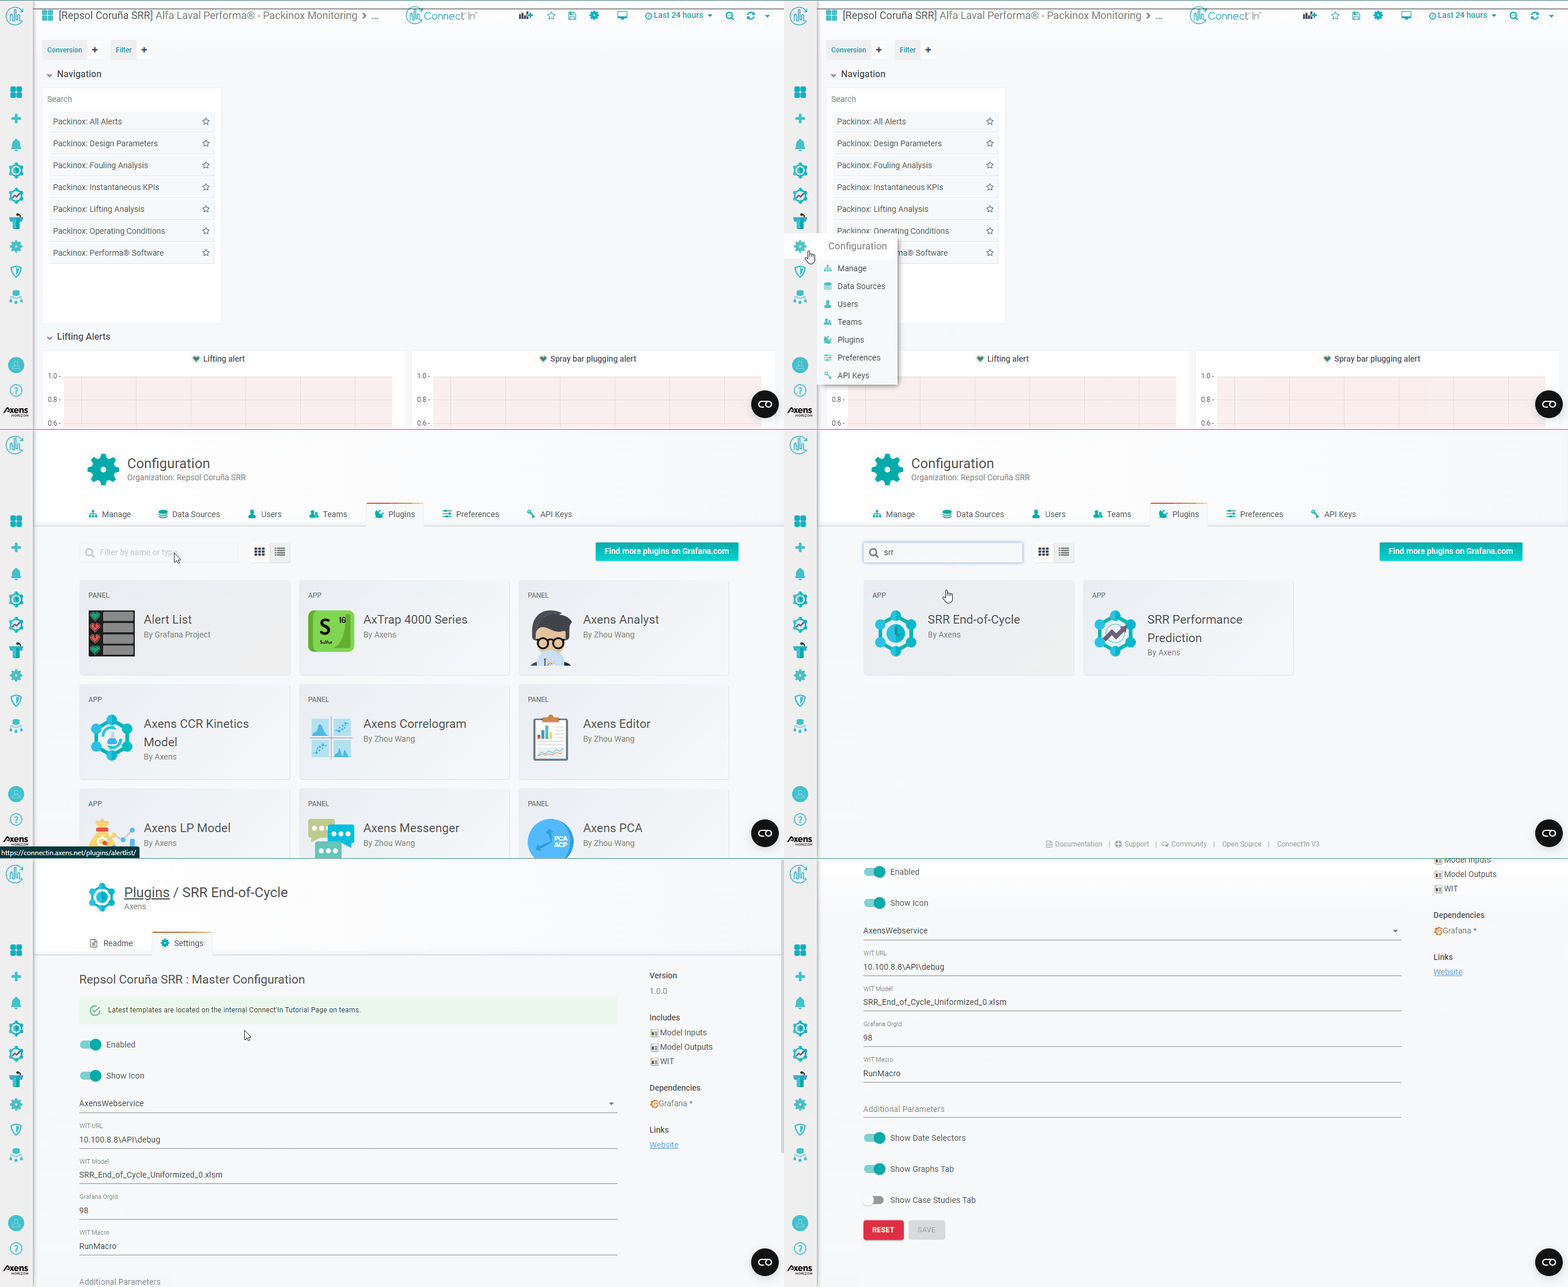
To add the SRR EOC WIT, go to the configuration icon (cog/gear) on the left navigation bar, click on "Plugins".
In the search bar, search for SRR EOC WIT and click on it.
Click on the "enable" switch to enable the WIT and the "show icon" switch to show the icon on the left navigation bar.
To continue this implementation, you will need someone from Axens to help you and give you a set of template files.
- Assuming that you already have contacted the concerned people and you have all the necessary files, you can continue the tutorial below:
Master Configuration
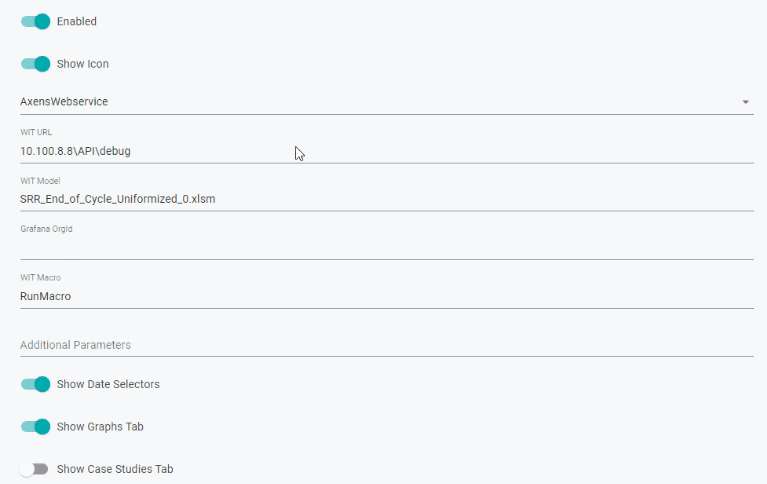
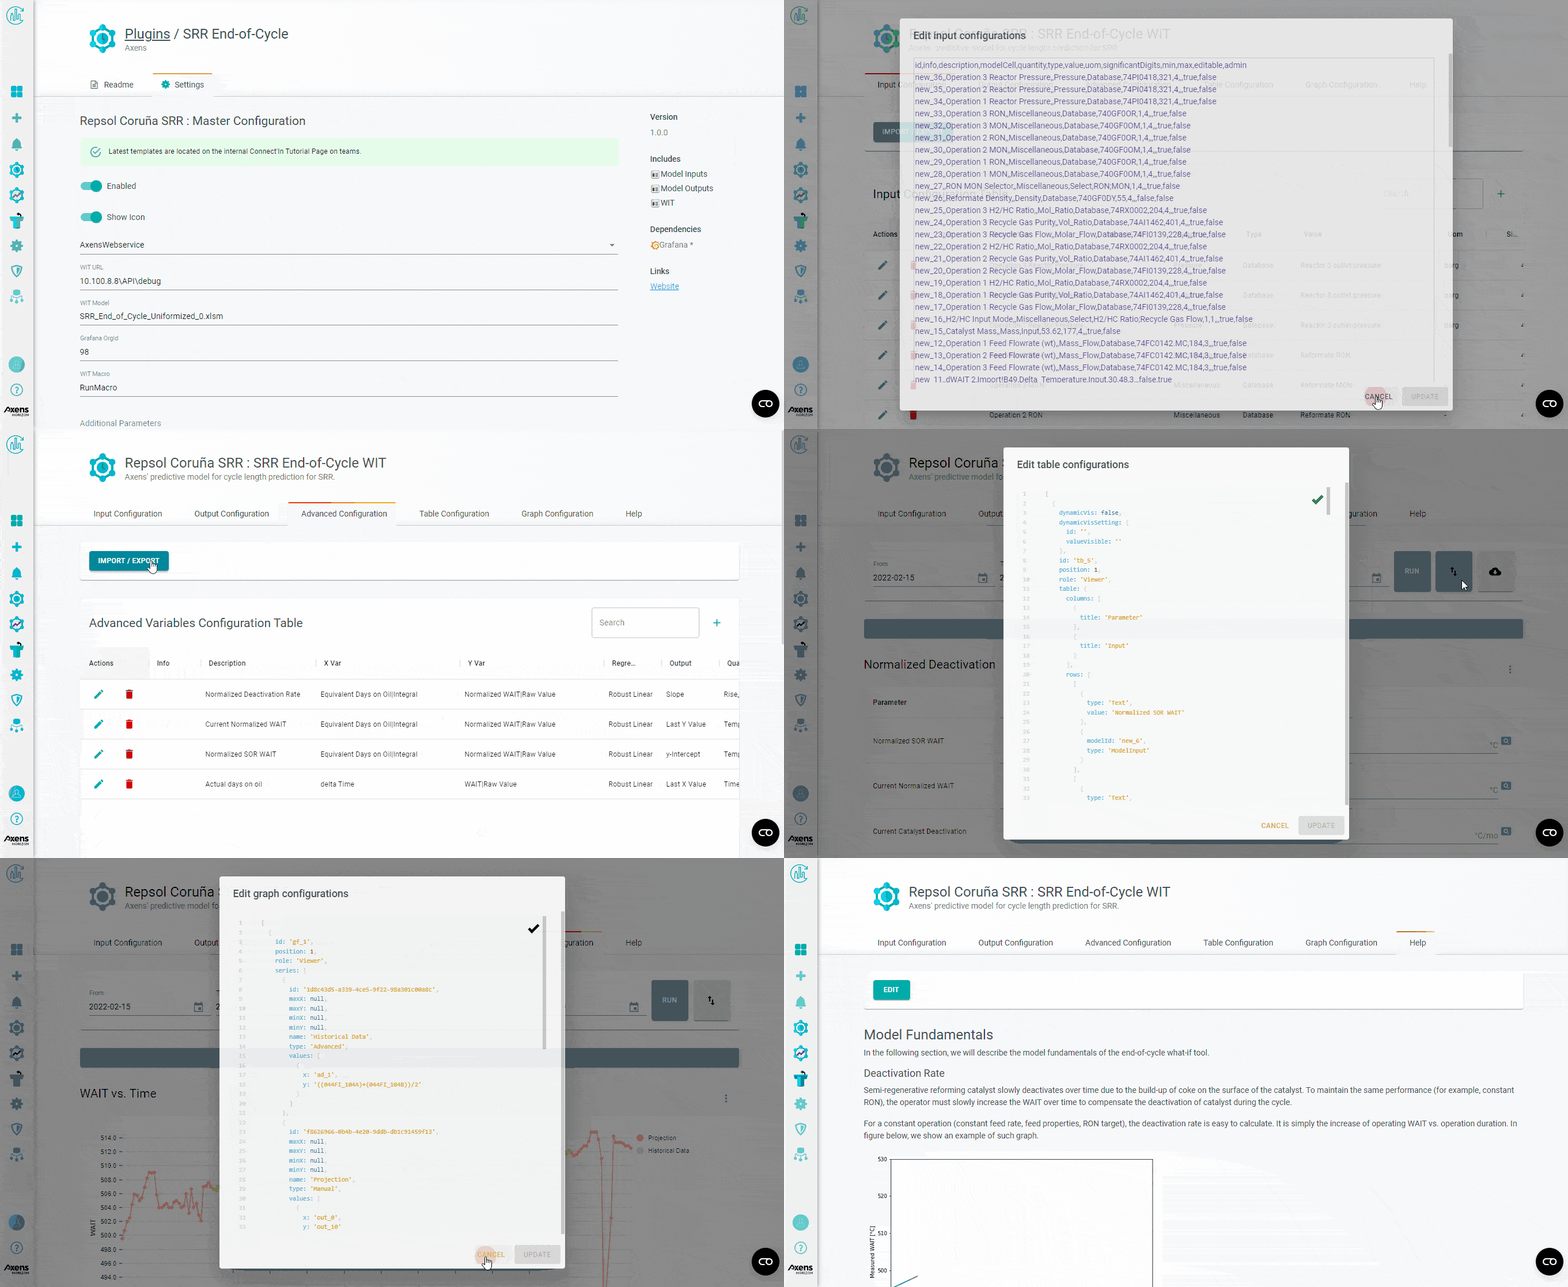
In the master configuration page, please set-up the parameters as follows.
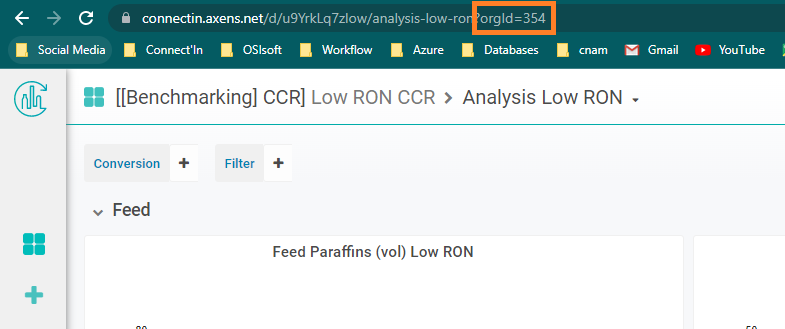
For Grafana OrgId, you can find it by going to any dashboard in the same organization. The url will show a orgId=###.
Enter this numeric value in the Grafana OrgId field.
For Additional Parameters, you can leave it blank. Turn off "Show Case Studies Tab"
Plugin Configurations
Go to model inputs tab, click on the import/export button. Copy and paste the contents of the "InputConfigs.csv" (look below for the files) to this pop-up window. Click update to import the template.
Repeat this procedure with Output Configs, Advanced Configs, Table Configs, Graph Configs, and Help.
This sets up the template from which you can work from.
Basic_Template has all the model inputs as they are (for example, customer need to enter a H2/HC ratio rather than a hydrogen flowrate. WHSV rather than a feed flowrate).
If you feel that another template is needed, feel free to add it to the folder below.
Filling in with Unit Specific Information
If you do not understand the WIT, go read the Help tab to understand what you're doing.
The template contains some default values which need to be customized for each unit.
These are located in the input configuration and the advanced configuration tabs.
For input configuration, the normalization reference conditions need to be updated (these are inputs with "Norm. Ref." in the description). Check the follow-up file for this information. The reference conditions should be the same as that used to calculate the normalized WAIT and normalized equivalent days on oil.
For input configuration, all the database "TAG_####_TAG" need to be updated with the correct tags from this unit.
For advanced configuration:
Normalized Deactivation Rate, Current Normalized WAIT, and Normalized SOR WAIT Advanced Variables
X Var = Normalized Equivalent Days ;
Y Var = Normalized WAIT
Actual days on oil:
X Var = delta Time;
Y Var = ACTUAL WAIT (measured, not normalized)
After these are filled in, the tables should appear and you should be able to run the calculations.
Adding user input customizations
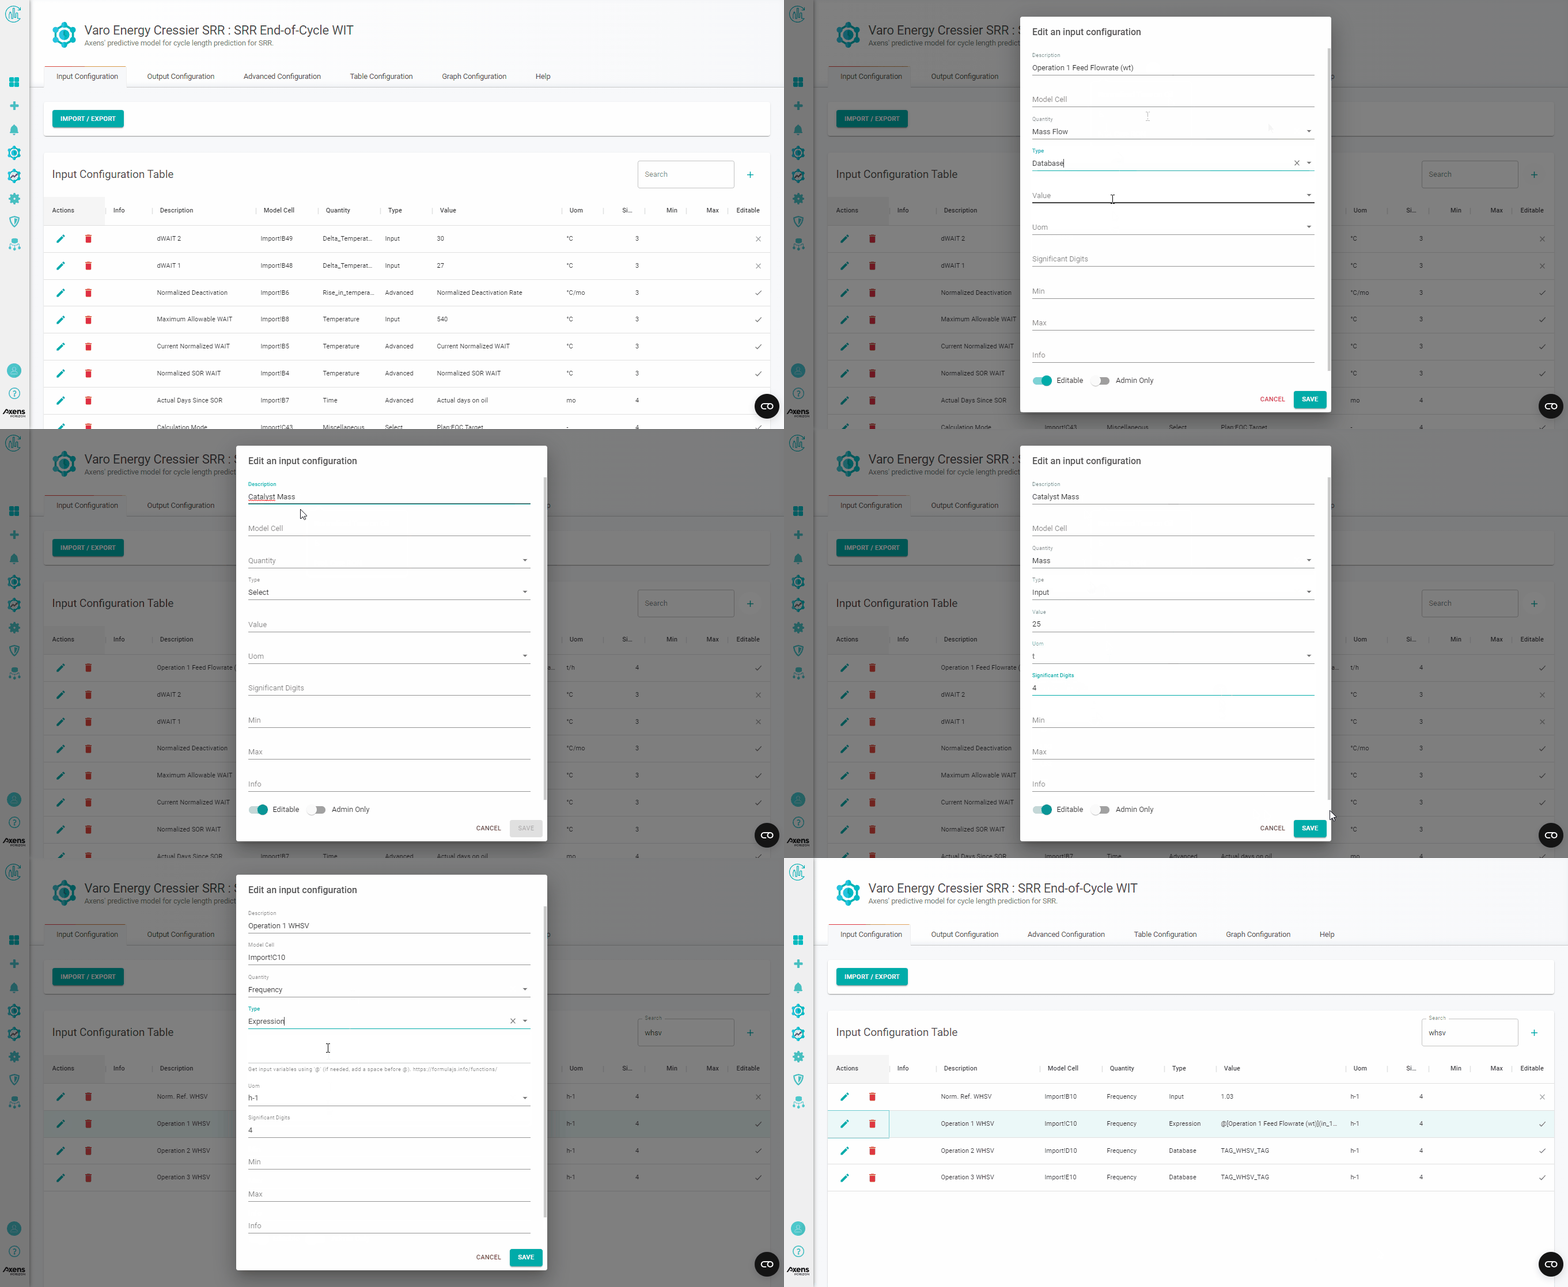
While a customer can enter a WHSV, it is better if they can enter a weight flowrate and the interface calculates a WHSV.
WHSV = feed weight flow / catalyst mass
In this example, we need to create a new input called Operation 1 Feed Flowrate (wt) (using HC feed flowrate tag from the database) and anther variable called Catalyst Mass (an input with a constant value).
We can then change the input type of Operation 1 WHSV (this already exist in the template) to an Expression. We then enter in the expression field:
@Operation 1 Feed Flowrate (wt) / @Catalyst mass
By setting this up, the WIT interface will calculate a WHSV from the expression.
After setting up the input configurations, you're not done yet! You still need to add the Operation 1 Feed Flowrate (wt) input variable to the table config! Where else would a user change this value? Do you need to add the Catalyst Mass input config to the tables? Does the user need to change the catalyst mass? Do they need to see it?
What are other calculations that can ease the use of the WIT? What about H2/HC ratio?
